Wifi Protected Setup (WPS)

Note
The following is valid for OpenWRT Release 18.06. Earlier OpenWRT or LEDE versions used a different approach.
Note
The following is specific to NETGEAR router models WNDR3700 and WNDR3800.

The WPS button is used to connect a wireless device or computer to your wireless network by WPS without the need to manually select the wireless network and enter a password.
This is not enabled on OpenWRT by default and additional software and configuration is needed to make it work.
Warning
Your workstation needs to have a wired Ethernet connection to the router, as Wi-Fi will be temporarily turned off during the next steps.
Software Packages
Open a SSH session on the router. Remove the wpad-mini package installed by default and install the wpad and hostapd-utils packages:
router$ opkg update
router$ opkg remove wpad-mini
router$ opkg install wpad hostapd-utils
Wireless Configuration
Setup WPS authentication support by adding option wps_pushbutton ‘1’ to
each wifi-iface section in the configuration file
/etc/config/wireless:
config wifi-iface 'default_radio0'
    option device 'radio0'
    option network 'lan'
    option mode 'ap'
    option ssid 'example.net'
    option encryption 'psk2'
    option key '********'
    option wpa_disable_eapol_key_retries '1'
    option wps_pushbutton '1'

config wifi-iface 'default_radio1'
    option device 'radio1'
    option network 'lan'
    option mode 'ap'
    option ssid 'example.net'
    option encryption 'psk2'
    option key '********'
    option wpa_disable_eapol_key_retries '1'
    option wps_pushbutton '1'
System Configuration
To tell the router to start the above script, whenever the WPS button is
pushed, add the following to the system configuration file
/etc/config/system:
config button
    option button   wps
    option action   released
    option handler  "/root/wps-button.sh"
    option min      0
    option max      3

config led
    option name 'WPS LED (green)'
    option sysfs 'netgear:green:wps'
    option trigger 'none'
    option mode 'link'
    option default '1'
    option delayon '500'
    option delayoff '500'
Reboot
A full reboot is needed to activate these changes.
Testing
Check the system log of the router after reboot. Look for messages containing WPS of the hostapd daemon:
router$ logread | grep WPS
daemon.notice hostapd: WPS: Converting push_button to virtual_push_button for WPS 2.0 compliance
daemon.notice hostapd: WPS: Converting push_button to virtual_push_button for WPS 2.0 compliance
Push the WPS button on the router.
The LED below the WPS button should start to blink in amber indicating that the router is ready to add a wireless device or computer by WPS.
Look for messages containing WPS of the hostapd daemon:
router$ logread -f
daemon.notice hostapd: wlan0: WPS-PBC-ACTIVE
daemon.notice hostapd: wlan1: WPS-PBC-ACTIVE
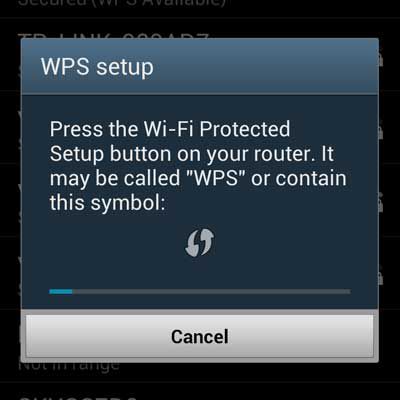
Initiate a WPS registration on a WPS capable device by pushing its WPS button.
Android devices can do this in their Wi-Fi settings page.
Select Advanced in the top right menu of the page with the list of all nearby wireless networks. Then choose the WPS Push Button option in the list.

After a few seconds a message like the following messages should appear in your routers system log, containing the MAC-Address of the connecting client:
router$ logread -f
daemon.notice hostapd: wlan1: WPS-REG-SUCCESS 65:59:c4:c1:3f:43 b9970010-f0c5-52d9-babf-e3c9e880d87d
daemon.notice hostapd: wlan1: WPS-PBC-DISABLE
daemon.notice hostapd: wlan1: WPS-SUCCESS
After the 2 minutes timeout, the amber WPS LED should stop blinking and your system log should get the following message:
router$ logread -f
daemon.notice hostapd: wlan0: WPS-TIMEOUT
According to the device manufacturers manual, with its original firmware the WPS LED stays solid green when wireless security is enabled in the router. We haven’t implemented this. The WPS LED normally stays off.